
Friday, May 18, 2012

Thursday, May 17, 2012
Remodeling With a Toddler
I have alot of people ask me regularly how I do as much as I do with a two-year-old in the house. I thought I'd type up a few short lines to fill you in on my "tips and tricks". They're nothing fancy or groundbreaking, but they sure do work for us!
1. Prep prep prep! This is something that can be done while your little one is awake and running around. I literally plan out every step of my project (down to the hour, often) to make sure that once he lays down for a nap or goes to bed I know exactly what I'm going to do, and I'm ready to jump in and do it. This includes making sure you eat lunch when your child does and you go to the bathroom before you put them down for a nap. Now nothing is in your way and you can conquer the world your latest remodel.
2. Gather supplies. For all of the projects I have been working on lately, I have everything I need on hand already. I get all of my "gear" together and put it in one place near my worksite. If there is something I need to complete my project that I don't have, we head out early in the morning when he's in his best mood and get everything that is needed. If you have prep prep prepped well, your list should be complete allowing you to only make one trip.
3. Teach your child to help. I'm not kidding. Even a toddler can learn to do this, and honestly, most of them love to be helpers. Now, while I don't let Little Man use the power tools, I do let him help me measure, take down notes, and run his little electric sweeper (which also gives me clean floors). Quite often I also let him help me gather my supplies, too, as long as they're not sharp or breakable.
4. Teach your child the all-important phrase, "Don't Touch!" and then that they need to obey it. It's gotten to the point in our house that every time I stand on a chair (which is frequent since I'm rather short) Little Man says, "Mommy's painting. No touch."
5. Give birth to a child that will entertain himself for hours on end. Not that you really have a choice in this matter, but my little one will sit in the den with books, blocks, and tractors, and it might be an hour or two before I hear from him. So very very much can be accomplished in this time frame. It's rather amazing.
Well, folks, that's how I do it. Nothing money-making about these ideas (and certainly nothing new), but they are definitely worth-while. I'm still working on that super awesome project I hinted at yesterday, and I can't wait to show you a finished project!
Wednesday, May 16, 2012
A Simple Project
We're in the middle of a small master bedroom rearrange/fix-up, and yesterday morning I wanted to add something to our gallery wall. The left side is pretty well filled out, but the right half has been rather anemic-looking for several weeks now. Rather than just have a large collection of photographs in black frames, I wanted to add some different elements in as well. Somewhere in the depths of Pinterest I found a really cute idea that I never bothered to pin. You simply take important dates from the history of your family, put them down on paper, and frame them. I decided to embroider mine on fabric. This is easily adaptable to multiple mediums (cross stitch, paint, print, marker, you get the idea), so it's the perfect customizable project.
I made my way to the Free Frame Box and pulled out a rectangular frame. After pulling the backing and glass out, I took it outside to spray paint.


Back inside, I used the frame glass as my guide and cut my white fabric to size. I actually doubled my fabric before cutting because I was using thin broad cloth, and I didn't want the thread on the back of the fabric to show through.


Back inside, I used the frame glass as my guide and cut my white fabric to size. I actually doubled my fabric before cutting because I was using thin broad cloth, and I didn't want the thread on the back of the fabric to show through.

Using a pencil, I lightly traced our dates: Mr. Chadwick's birthday, my birthday, our anniversary, and Little Man's birthday.


If you'll notice, I left a space open at the bottom in case one day I might need to add another birthday. Better safe than sorry have to explain to a "youngest child" why their birthday didn't get included in our list of important dates.
And, actually, after I put it on the wall, I realized that I really didn't like the embroidery. I think I may try one of those "other mediums" I mentioned at the beginning of the post to make it look more modern. Which do you think I should use?
And, actually, after I put it on the wall, I realized that I really didn't like the embroidery. I think I may try one of those "other mediums" I mentioned at the beginning of the post to make it look more modern. Which do you think I should use?

Also note, I did not show you a complete picture of the wall because we are indeed currently making some changes in here, and I want them to be complete before I reveal them to you. At some point there will be a hacksaw involved. That may take a while. Please don't hold your breath. Your doctor won't thank me.
I also scored a sweet deal on a piece of furniture Mr. Chadwick found on the side of the road. It needs a good bit of work, so if I'm absent here tomorrow it's because I'm busy refinishing this secret piece. I can't wait to share it with you all!!
I also scored a sweet deal on a piece of furniture Mr. Chadwick found on the side of the road. It needs a good bit of work, so if I'm absent here tomorrow it's because I'm busy refinishing this secret piece. I can't wait to share it with you all!!
Tuesday, May 15, 2012
While We're At It
Yesterday, I showed you how I had rearranged the living room to make it a little more "cozy". It still needs a rug and a table and two arm chairs, but, hey, for now it's more cozy. Well, while I was in the mood to move things around the house (which apparently is a chronic condition of mine), I thought I would tackle the wall in the den by the built-ins. At Christmas, I took an old window frame we got for free from the Chadwick farm, and used it to display my grandmother's vintage Shiny Brights. After Christmas was over, however, I didn't really know what to do with it. So, I just threw some random stuff on the wall and called it a day.


It's really been bothering me. I didn't like it when I put it up, and it never grew on me. So, naturally, I decided to move it.

It helps fill out Little Man's new corner, but it left me with two big empty spaces. One here, in the living room where the painting of the violin used to be,

and one here in the den. I'm currently looking for things I can get for free or cheap to put on top of the piano to help fill it out (spray paint can work wonders), but I really wanted to go ahead and tackle the wall in the den.

I opted for the same technique I used for the art over the tub in the guest bath. Free frames, slap on a little white paint, old paint chips, and a circle punch.


And, voilá! I used different shades of gray for the majority of my circles, with only four colored ones mixed in on each frame.


It's really one of my favorite projects so far. They fill out the wall so nicely, and the white is so crisp and bright. I made sure to leave enough empty space at the bottom of the wall so I could get a narrow entryway table (eventually). Much better than that haphazard frame situation. Don't you agree?
Monday, May 14, 2012
I Just Can't Help Myself
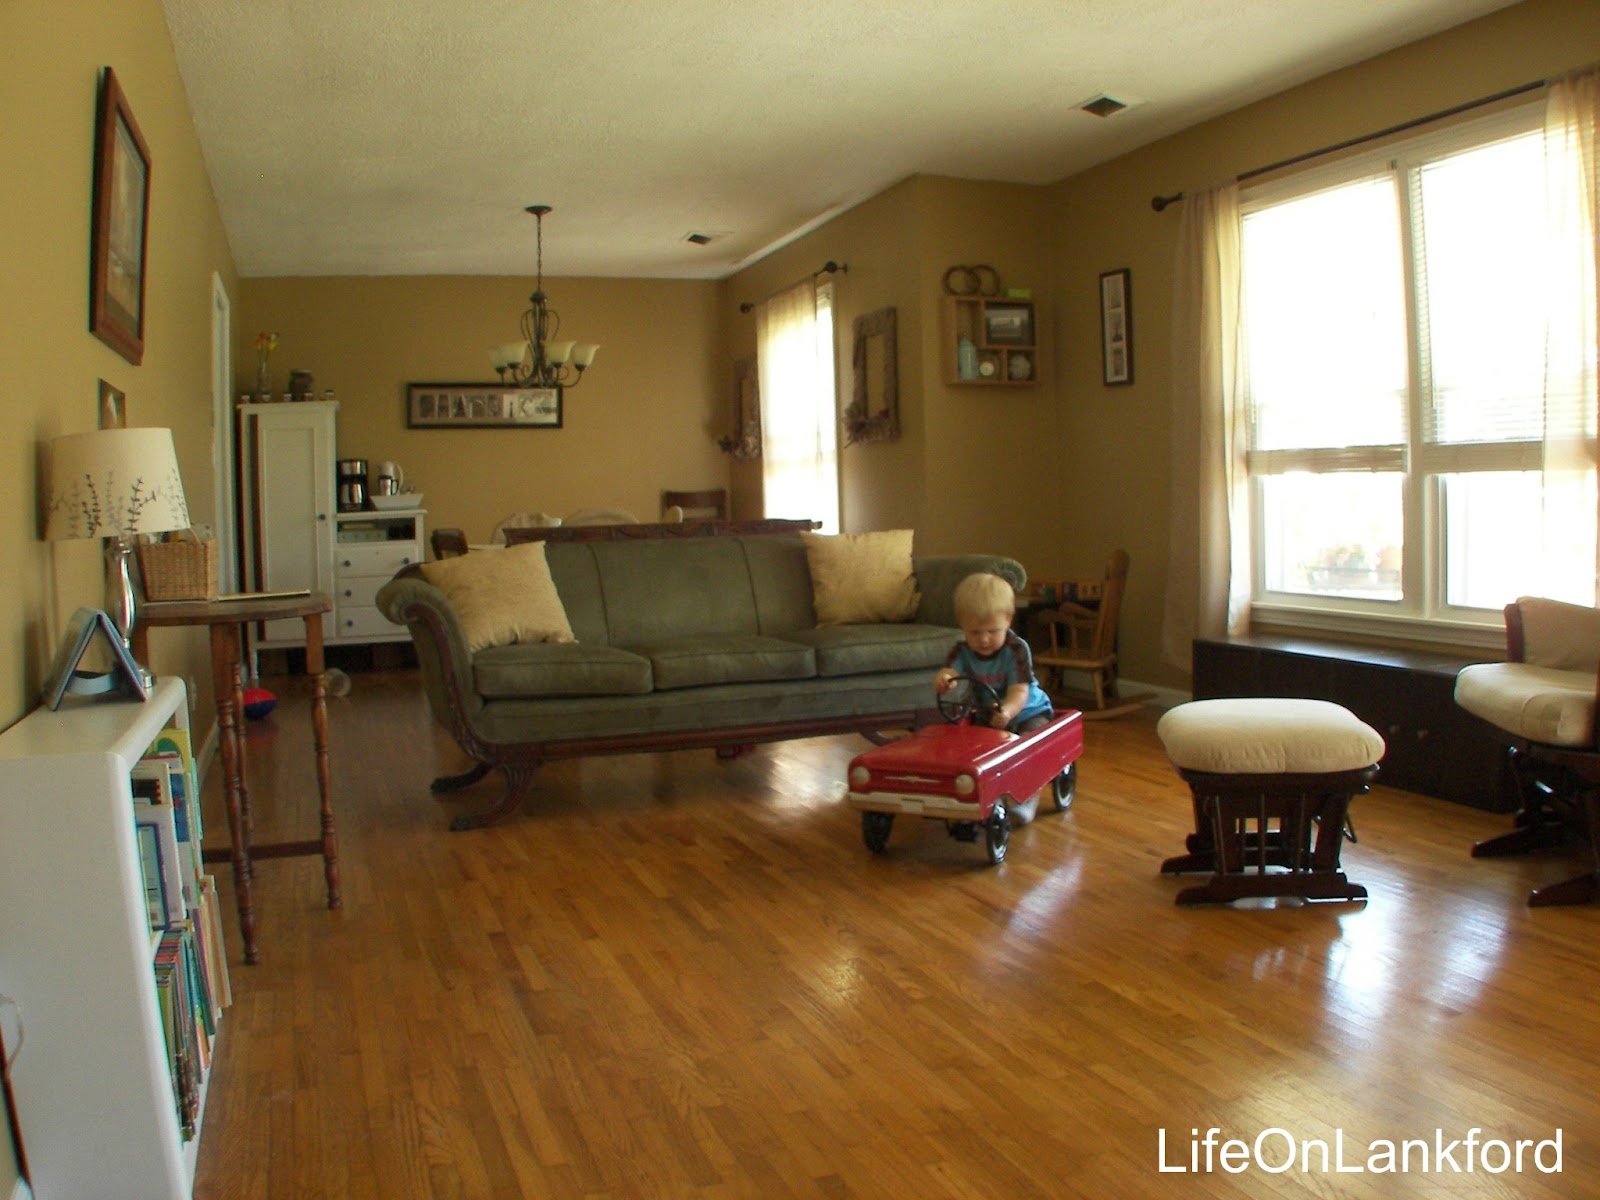
Last Thursday morning, the mother of one of Mr. Chadwick's students came over to give me some ideas and advice on places in the house that have me stumped. The main area was the Great Room. She had some really terrific ideas, and not five minutes after she left, I had changed into the stay-at-home-mommy version of work clothes (t-shirt and shorts) and was moving that furniture! My amazing consultant noted the feeling of a "bowling alley" in the Great Room, which is something I've noticed for a while but not really known what to do with.
Anyone else getting the urge to throw some strikes?

Without buying anything or pulling in furniture from other rooms, I have a brand new space. Presto change-o, move that sofa. And chair and table and bookcase.

My plan is to get two arm chairs for this space and put one where that tall table with the photograph is (moving the table to a different room) and put the other arm chair where the glider rocker and ottoman are currently residing (also to relocate to a different room). That will open up the floor plan a little leaving room for a rug and round ottoman in the center without making it feel cluttered. There will also be more seating for those of us who like to have company over and then sit and gab. In addition to additional furniture, I'm searching for the perfect frames for that large photo of a certain Little Man and the one of the Mr. and Mrs. that I have in the den. I can't wait to fill out that potential photo wall!

This space has come a long way since we first bought the house. For that matter, it's come a long way from the way it looked a mere eight months ago.
I was even able to set up a little corner just for my sweet Little Man. It's still rather empty, but I assure you, the wheels are a-turnin'!

And, again, a big big thanks to Melony for her time and great ideas!!
Friday, May 11, 2012
Friday Photo

Photo Credit to Russell Cook
I'm doing something today I've never before done on the blog. Posting someone else's photo. Now, granted, that photo belongs to my father, but nonetheless it isn't mine. I wanted to post this for you today in celebration of my brother's achievement. He is now the proud owner of a Master's Degree from the University of Tennessee at Knoxville. And a new PhD student. Goodness. Now, as much as I love you, Matthew, my absolute favorite part of this photo is the joy on my father's face. Joy in the accomplishment of his child.
Matthew, we all love you and are so proud of who you are and what you are doing with you life!
Thursday, May 10, 2012
It's a Numbers Game
216: The number of (free to me) plants I planted yesterday. I know, right? Thanks so much, Woodards!
217: The number of weeds I pulled yesterday. I do not say this in jest. I'm pretty sure it really was 217.
1: The number of 4-leaf clovers I picked yesterday. If you pick a 4-leaf while weeding, the weeds don't come back, right?
57: The number of cars that drove by and saw my rumpus sticking out in the air because my legs were too tired to keep squatting and standing up and squatting and standing up.
2: How many gardening gloves I should have but don't.
0: The number of times I swept potting soil off the porch. But, honestly, with that carpet it truly doesn't matter.
1: The number of times I got stung.


217: The number of weeds I pulled yesterday. I do not say this in jest. I'm pretty sure it really was 217.
1: The number of 4-leaf clovers I picked yesterday. If you pick a 4-leaf while weeding, the weeds don't come back, right?
57: The number of cars that drove by and saw my rumpus sticking out in the air because my legs were too tired to keep squatting and standing up and squatting and standing up.
2: How many gardening gloves I should have but don't.
0: The number of times I swept potting soil off the porch. But, honestly, with that carpet it truly doesn't matter.
3: How many hours Little Man napped. Seriously, dear readers, this is how I get stuff done.
6: Gallons of water hauled to and poured on all of my new (FREE) plants.
3: How often I've visited Urgent Care in the last 10 weeks for my ears. Completely irrelevant to this post.
2: How many hanging baskets I have that are technically too small. However, I already had them. And our mantra is "Use What you Have".
I took extra care to make double sure all of my before pictures were taken with Instagram and most of the afters with my "real" camera, because the worse a before shot looks, the better the after pictures look. Correct?
Anyway, here are the before pictures:


And after:


Wednesday, May 9, 2012
Today

Today, I'm:
enjoying a quiet breakfast.
looking forward to getting my hair trimmed!
trying to find something else in the house to paint.
looking through all of my leftover paint to see how much painting I could do.
wishing someone would volunteer to weed my flower beds for me.
on week ten of fluid-filled ears.
thinking it's pretty gross that there's fluid oozing out of said ears.
reminded that blessings are blessings no matter how big or small.
Tuesday, May 8, 2012
The Front
So picture with me: two large plants in two huge planters on either side of the door. Dark brown shutters. White porch swing. Huge ferns hanging between each set of columns (three ferns total). Window boxes placed on the front windows with brightly colored flowers. Ugly carpet gone, concrete restored and stained? Painted?
What do you think? Mr. Chadwick and I are going to spend the summer and early fall searching out deals to get this porch looking good. Do you have thoughts on what kind of plants to get? Some kind of small evergreen, perhaps? What color should the shutters be? Dark brown? Something light? We would LOVE feedback!
Monday, May 7, 2012
Peanut Butter Granola

Peanut Butter Granola:
8 cups old fashioned oats
1 cup peanut butter
1 cup honey
2 tsp salt
2 tsp vanilla
4 tsp butter
Preheat oven to 350. Put oats in a large mixing bowl. Melt butter in saucepan. Place the rest of ingredients in saucepan with butter until liquid. Pour peanut butter mixture over oats and stir until oats are well covered. Place in oven and bake for 15 minutes. Stir and then bake for another 5-10 minutes. Let granola cool and then put in airtight container.
This is our favorite breakfast food. I like to add a few chocolate chips and shredded coconut, heat in the microwave for 30 seconds, and pour milk over the top. Yummy!
Friday, May 4, 2012
Friday Photo
I know you are probably all tired of looking at my kitchen, but I finally found a good "before picture" of our old stove. You know, that old drop-in, directly-wired-into-the-wall stove that only had one working burner?

And now...

Now, come on. You all can't tell me you're tired of seeing before and after pictures of my kitchen now, can you?
Thursday, May 3, 2012
Two For The Price of One
Painted rooms, that is. At the end of my post yesterday, I mentioned that after painting the kitchen I still have a little over a half gallon of beautiful, gray paint. Well, seeing as to how we're so fond of gray around here, I decided that while I had the paint and since all of my supplies were already out anyway I may as well go ahead and paint Little Man's room.
I have been dreaming of this room in gray ever since I first saw the house in November of 2010. When we closed on the house a few weeks later, I just knew that within a couple of months that green would be singing it's swan song. It did not. We decided to do other things instead. Like tear out all of the carpet.
Gray, gray, gray. It's a sophisticated color that can grow with a little boy, whereas that green is not. Lime green is a cute little color for a temporary nursery, and goodness knows Little Man loves the color green, but it's just not what I envisioned for his growing up space.


Very bright. Very friendly. And very much age-specific. When he's 10 years old, this green will no longer be awesome. A nice shade of gray, however, can be a sophisticated but cute nursery, a handsome room for a little boy, and a classy space for a teenager to study. Don't you think?


Chore chart by Melissa and Doug.


Give us a couple of weeks and there will be a floor-to-ceiling built-in bookcase where this white shelf is.


You'll be seeing these switch plates pop up in all of the rooms of the house over the next few months. I just love them!
This room feels so much calmer to me now. The green was bright and fun, but this light gray says relaxed and restful.
Four hours after I started, I had the room done and about six drops of paint left in the bottom of the can.

Who in their right mind could waste six drops of paint? Not me! But what to do with it??

Why, tape off that ivory-colored, framed dry erase board from the kitchen and paint it, of course!
Dingy-looking before:

Blending-in After:

It works. I'm still trying to decide what to use as an accent color in the kitchen (goldenrod, anyone?), and I think this is nice for now. Not to mention I didn't throw out those six drops of remaining paint!
So, for the measly price of painting one room, I was able to paint two rooms and a dry erase board frame. I just saved us $30! And that, ladies and gentlemen, is how you do two for the price of one in the painting world.
Subscribe to:
Posts (Atom)